DIY Photo Frame Idea
1.0
DIY Photo Frame Idea
1.0
DIY photo frame idea
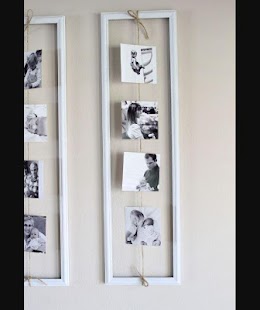
Find your favourite DIY photo frame idea in this app!
Imagine being able to frame your own photographs, prints, tapestries, and artwork as well as a professional. Picture framing is actually quite fun and easy to DIY photo frame idea . There are 5 easy steps to framing.
Step 1 - How to Cut Mats
Adding a colour border (the mat) around your artwork enhances the picture and provides a restful area between the image and the picture frame. The colour and size of the mat board must be decided first, as this will determine the overall dimensions of your picture frame. You start by calculating the external size of the mat.
Step 2 - How to Cut the Picture Frame
How much DIY photo frame idea moulding material will I need? Carefully measure the picture and mat you wish to frame. Add an extra (3mm) for "play" to ensure the picture fits easily into the finished picture frame.
Step 3 - How to Clamp Frames
How do you Clamp the Frame? Clamping the frame tightly is essential for good joining. You can use the a Cord Clamp, or the Steel Strap Clamp to secure the picture frame ready for joining. The advantage of the Strap Clamp is that you can see all the four corners of the picture frame clamped together before joining. So alignment of the corners is easy. All corners should match up evenly. Apply a little wood glue to all corners of the frame for added strength. Carefully tension the clamp making sure that the corners are aligned then secure the clamp tightly.
Step 4 - How to Join Frames
Most DIY photo frame idea are joined with a V-Nail. This is the easiest method and it is what the professional picture framer uses. The FrameCo PushMaster joining tool, inserts V-Nails into the corner of the frame. Two V-Nails in each corner is usually all that is necessary. The PushMaster can be used by hand alone on most DIY photo frame idea , or you can tap the PushMaster with a mallet if the frame is hardwood. The PushMaster can be upgraded to the BenchMaster® which will insert V-Nails into the harderst of timbers.
Step 5 - How to Finish Frames
Take the empty DIY photo frame idea to a glass merchant and have them cut a piece of glass for you. If you wish to cut glass yourself use a good quality oil filled cutter, or the Glass Cutter. Use only 2mm plain or non-reflective glass. To seal the artwork in the DIY photo frame idea , tape over the brads/flexipoints using a good quality backing tape. This will prevent dust or insects getting into the picture. To hang your picture, again use your PushMaster tool. Measure one third down the side of the picture frame from the top and mark that spot. Place a screw eye into the slot provided in the end of the Pushmaster tool, then screw the eye into the frame. Repeat on the other side and then attach wire from one side to the other.
You have now completed your DIY photo frame idea project. More information about how to make picture frames can be viewed at http://www.clubframeco.com/5_steps_Introduction.html
FrameCo Framing Supplies designs and manufactures diy picture framing tools and export to many countries. We also supply picture frames conduct framing classes.
Article Source: http://EzineArticles.com/expert/Gary_Leete/7336
Article Source: http://EzineArticles.com/215121


Celkové hodnocení
Sdílet
Souhrnné informace o DIY Photo Frame Idea
-
Verze programu
1.0 -
Autor
-
Potřeba instalace
ano -
Jazyk
- Angličtina
-
Staženo
0× celkem
0× tento měsíc -
Poslední aktualizace
29. 8. 2017